Our Location
1103A Tianhui Building, Yeqin 1st Road, Longcheng Street, Shenzhen, Guangdong, China
1103A Tianhui Building, Yeqin 1st Road, Longcheng Street, Shenzhen, Guangdong, China
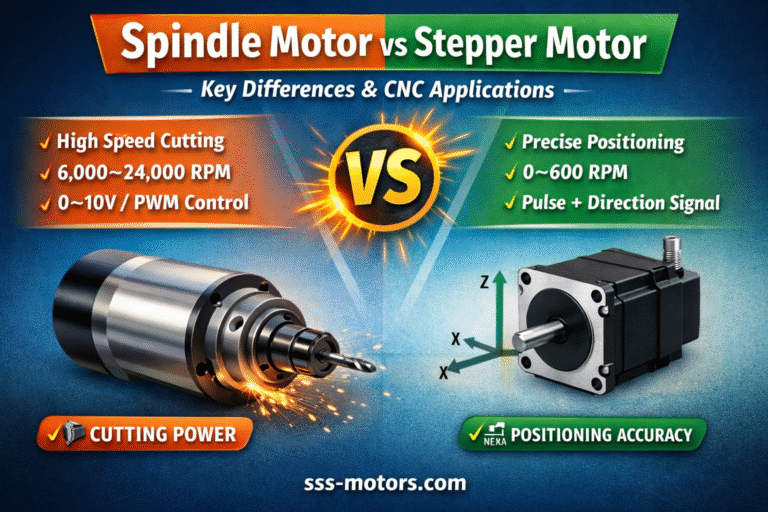
Stepper motors play a critical role in industrial automation, CNC machines, robotics, and motion control systems.
Therefore, understanding a correct stepper motor wiring diagram is essential for achieving stable performance and precise positioning.
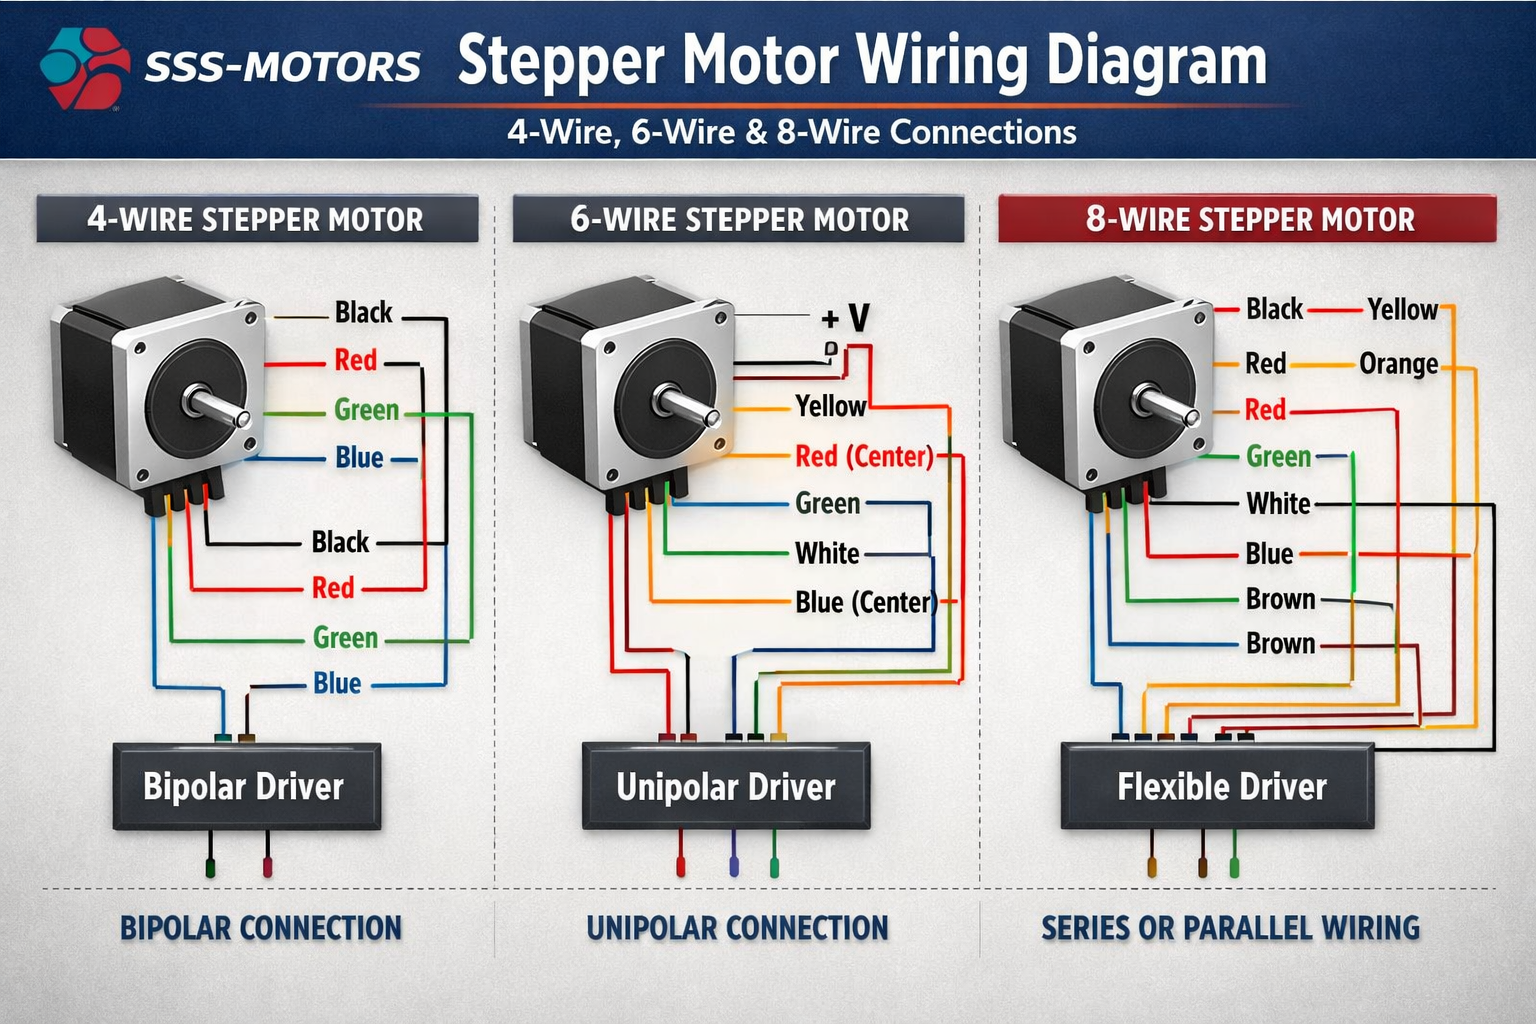
In this guide, we clearly explain how to wire 4-wire, 6-wire, and 8-wire stepper motors, while also helping you choose the most suitable configuration for your application.
If you are still evaluating motor types or torque requirements, we strongly recommend reading
How to Choose a Stepper Motor
and browsing our full range of products in the
Stepper Motor Product Category.
A 4-wire stepper motor typically operates as a bipolar motor with two independent coils.
Because this configuration does not include center taps, the driver must actively reverse current direction.
As a result, 4-wire stepper motors usually deliver higher torque and better efficiency.
    +----------------------------+
    |   Stepper Motor (4-Wire)   |
    +----------------------------+
           |       |
          ---     ---
          | |     | |
    +-----+---+-----+---+-------+
    |    Coil A        Coil B    |
    +-------------------------------+
         |                        |
         |                        |
   +-----+-----+            +-----+-----+
   | Driver A  |            | Driver B  |
   +-----------+            +-----------+
A 6-wire stepper motor includes two coils with center taps.
Therefore, users can operate this motor as a unipolar stepper motor or convert it for bipolar use.
Because of this flexibility, 6-wire motors remain popular in legacy systems and cost-sensitive applications.
     +----------------------------+
     |   Stepper Motor (6-Wire)   |
     +----------------------------+
        |    |    |   |    |    |
       ---  ---  ---  ---  ---  ---
       | |  | |  | |  | |  | |  | |
    +--+---+--+--+--+--+--+--+--+--+
    | Coil A  |  Coil B  |  Common  |
    +-------------------------------+
         |                      |
         |                      |
    +----+----+            +----+----+
    | Driver A |            | Driver B |
    +-----------+           +-----------+
However, if you want higher torque, you can ignore the center taps and wire the motor as a bipolar stepper motor instead.
An 8-wire stepper motor offers the highest level of wiring flexibility.
Because each phase consists of two separate coils, users can choose series or parallel bipolar configurations.
Consequently, engineers often select 8-wire motors for high-performance industrial applications.
     +-----------------------------+
     |   Stepper Motor (8-Wire)    |
     +-----------------------------+
           |     |     |     |     |
          ---   ---   ---   ---   ---
          | |   | |   | |   | |   | |
    +-----+--+---+--+---+---+---+---+----+
    | Coil A1   Coil A2   Coil B1   Coil B2 |
    +---------------------------------------+
         |              |              |
         |              |              |
      +--+----+      +--+----+      +--+----+
      | Driver |      | Driver |      | Driver |
      +--------+      +--------+      +--------+
Before powering on the system, always review the following points.
Moreover, these checks help prevent wiring errors and motor damage.
Correct wiring does not only determine whether a stepper motor rotates properly.
More importantly, it directly affects available torque, current distribution, and thermal performance.
For example, choosing series or parallel wiring on an 8-wire stepper motor can significantly change torque output at different speeds.
To fully understand how wiring configuration influences holding torque and dynamic torque,
we strongly recommend reading our in-depth technical guide:
Stepper Motor Torque Explained.
This article helps engineers match wiring methods with real load requirements.
A correct stepper motor wiring diagram directly impacts system stability, torque output, and positioning accuracy.
Therefore, understanding the differences between 4-wire, 6-wire, and 8-wire stepper motors allows you to make better design decisions.
If you are selecting motors for a new project, explore our
Stepper Motor Products
or continue reading our detailed guide on
How to Choose a Stepper Motor.